Basics to making New Style Reticles: Difference between revisions
Zero_Falcon (talk | contribs) mNo edit summary |
|||
| (3 intermediate revisions by 2 users not shown) | |||
| Line 3: | Line 3: | ||
{{Note|This article is currently work in progress.}} | {{Note|This article is currently work in progress.}} | ||
(For instructions on how to convert | (For instructions on how to convert your *.bmp files into bmp.mdl files, follow the instructions here: http://www.freeallegiance.org/FAW/index.php/Targeting_reticles ) | ||
In 2006, Psychosis and Mesial discovered how to make different parts of a ret change color differently so as to give a greater degree of judging accuracy: | In 2006, Psychosis and Mesial discovered how to make different parts of a ret change color differently so as to give a greater degree of judging accuracy: | ||
[[File:Newstyler.png]] | [[File:Newstyler.png|thumb|left]]{{clear}} | ||
Some of us have wanted to make our own New Style Rets, but when we look at the centeroutbmp.mdl files, we can't make sense of the colors... Below is one of TheBored's ret #1: | Some of us have wanted to make our own New Style Rets, but when we look at the centeroutbmp.mdl files, we can't make sense of the colors... Below is one of TheBored's ret #1: | ||
[[File:Centeroutbmp26.png]] | [[File:Centeroutbmp26.png|thumb|left]]{{clear}} | ||
Just about anyone can make an 'Old Style Ret' - you just modify the centeroutbmp.mdl file with just 1 colour (in most cases, white), chisel it into the suitable shape you want, put it in your artwork directory and you're good to go. A New Style Ret is totally different, though - you will have to experiment with several different color combinations as well as ret shapes (this is applicable to Old Style Rets as well) before you find the ret that is suited for your playing style. For example, below is [[Zero_Falcon]]'s gargantuan 1360x768 ret, a big contrast to those using small reticles like 'TheMan' and the 'Dot': | Just about anyone can make an 'Old Style Ret' - you just modify the centeroutbmp.mdl file with just 1 colour (in most cases, white), chisel it into the suitable shape you want, put it in your artwork directory and you're good to go. A New Style Ret is totally different, though - you will have to experiment with several different color combinations as well as ret shapes (this is applicable to Old Style Rets as well) before you find the ret that is suited for your playing style. For example, below is [[User:Zero_Falcon|Zero_Falcon]]'s gargantuan 1360x768 ret, a big contrast to those using small reticles like 'TheMan' and the 'Dot': | ||
[[ | [[IMAGE:Pewpewc.png|thumb|left]]{{clear}} | ||
With this guide you will be able to setup the basics of making New Style Rets. | With this guide you will be able to setup the basics of making New Style Rets. | ||
| Line 26: | Line 26: | ||
For the purpose of this guide the centeroutbmp.mdl file below was created to demonstrate how the Red and Green Color values affect the way a ret changes color. | For the purpose of this guide the centeroutbmp.mdl file below was created to demonstrate how the Red and Green Color values affect the way a ret changes color. | ||
[[File:Rgb.png]] | [[File:Rgb.png|thumb|left]]{{clear}} | ||
Under each square you can see the color channels that make them up. Under the RGB format, Red and Green makes Yellow. | Under each square you can see the color channels that make them up. Under the RGB format, Red and Green makes Yellow. | ||
| Line 32: | Line 32: | ||
This is how it looks like ingame: | This is how it looks like ingame: | ||
{| cellpadding=5 cellspacing=0 | |||
|- | |||
[[File:52383594.png]] | |[[File:52383594.png|thumb|left|Right on target]] | ||
|[[File:Inouty.png|thumb|left|Not so right on target]] | |||
|[[File:Outj.png|thumb|left|Not on target]] | |||
|} | |||
[[File:Inouty.png | |||
[[File:Outj.png]] | |||
From the screenshots, you can see that the square that doesn't have a green value will NEVER turn green when on target and the square with no red value will NEVER turn red when 'off target'. The middle square has both red and green values and will shift between the 2 colors - default/Old Style reticle behavior. | From the screenshots, you can see that the square that doesn't have a green value will NEVER turn green when on target and the square with no red value will NEVER turn red when 'off target'. The middle square has both red and green values and will shift between the 2 colors - default/Old Style reticle behavior. | ||
| Line 48: | Line 43: | ||
Let us now examine Mesial's ret (with blue channel removed to avoid confusion): | Let us now examine Mesial's ret (with blue channel removed to avoid confusion): | ||
[[File:Mesret.png]] | [[File:Mesret.png|thumb|left]]{{clear}} | ||
And to demonstrate the strictness of different shades of green, the following centeroutbmp.mdl was made: | And to demonstrate the strictness of different shades of green, the following centeroutbmp.mdl was made: | ||
[[File:Strictnesstest.png]] | [[File:Strictnesstest.png|thumb|left]]{{clear}} | ||
Its appearances ingame: | Its appearances ingame: | ||
| Line 58: | Line 53: | ||
Here, both green squares are black off-target. | Here, both green squares are black off-target. | ||
[[File:Out2j.png]] | [[File:Out2j.png|thumb|left]]{{clear}} | ||
A little closer to the target now, but the left square (which is dark green in the centeroutbmp.mdl file) still looks black (and if it had a red value, it would still be glaring red), '''prompting you to improve your aim some more.''' (Ok, depending on your monitor settings you may see that either the whole lower half is all black or that the left square actually has some shade of green...) | A little closer to the target now, but the left square (which is dark green in the centeroutbmp.mdl file) still looks black (and if it had a red value, it would still be glaring red), '''prompting you to improve your aim some more.''' (Ok, depending on your monitor settings you may see that either the whole lower half is all black or that the left square actually has some shade of green...) | ||
[[File:Inout2.png]] | [[File:Inout2.png|thumb|left]]{{clear}} | ||
Directly on target. Since the left square's green value is 128, its maximum green value ingame is also 128. | Directly on target. Since the left square's green value is 128, its maximum green value ingame is also 128. | ||
[[File:In2x.png]] | [[File:In2x.png|thumb|left]]{{clear}} | ||
== Reticle Mechanics - Color Combinations == | == Reticle Mechanics - Color Combinations == | ||
Latest revision as of 01:58, 18 February 2011
Note A few members of our community have prepared many customized targeting reticles for easy download. They are available from Mesial's site.
Note This article is currently work in progress.
(For instructions on how to convert your *.bmp files into bmp.mdl files, follow the instructions here: http://www.freeallegiance.org/FAW/index.php/Targeting_reticles )
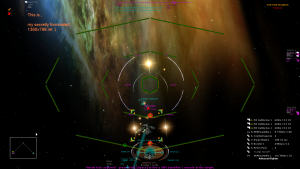
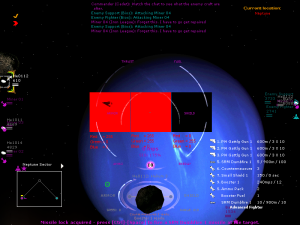
In 2006, Psychosis and Mesial discovered how to make different parts of a ret change color differently so as to give a greater degree of judging accuracy:
Some of us have wanted to make our own New Style Rets, but when we look at the centeroutbmp.mdl files, we can't make sense of the colors... Below is one of TheBored's ret #1:
Just about anyone can make an 'Old Style Ret' - you just modify the centeroutbmp.mdl file with just 1 colour (in most cases, white), chisel it into the suitable shape you want, put it in your artwork directory and you're good to go. A New Style Ret is totally different, though - you will have to experiment with several different color combinations as well as ret shapes (this is applicable to Old Style Rets as well) before you find the ret that is suited for your playing style. For example, below is Zero_Falcon's gargantuan 1360x768 ret, a big contrast to those using small reticles like 'TheMan' and the 'Dot':
With this guide you will be able to setup the basics of making New Style Rets.
Reticle Mechanics - Effects of colors in centeroutbmp.mdl
As you may have noticed, rets can change color from red to green. Blue is totally unused, i.e. only the Red and Green channels are used (because that's what the ret uses ingame anyway)
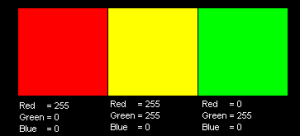
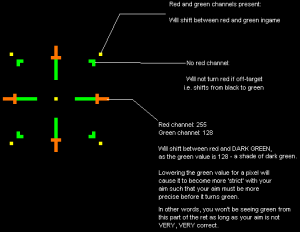
For the purpose of this guide the centeroutbmp.mdl file below was created to demonstrate how the Red and Green Color values affect the way a ret changes color.
Under each square you can see the color channels that make them up. Under the RGB format, Red and Green makes Yellow.
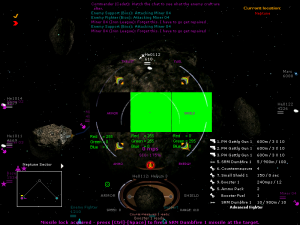
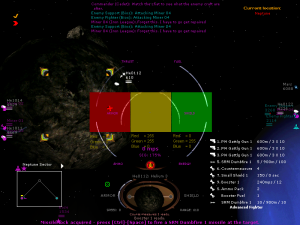
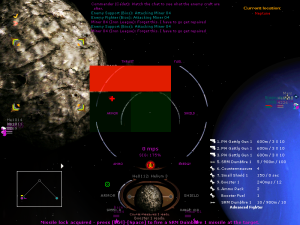
This is how it looks like ingame:
From the screenshots, you can see that the square that doesn't have a green value will NEVER turn green when on target and the square with no red value will NEVER turn red when 'off target'. The middle square has both red and green values and will shift between the 2 colors - default/Old Style reticle behavior.
Let us now examine Mesial's ret (with blue channel removed to avoid confusion):
And to demonstrate the strictness of different shades of green, the following centeroutbmp.mdl was made:
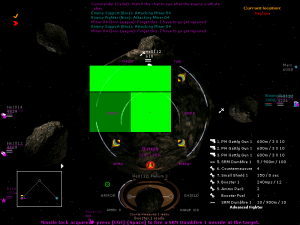
Its appearances ingame:
Here, both green squares are black off-target.
A little closer to the target now, but the left square (which is dark green in the centeroutbmp.mdl file) still looks black (and if it had a red value, it would still be glaring red), prompting you to improve your aim some more. (Ok, depending on your monitor settings you may see that either the whole lower half is all black or that the left square actually has some shade of green...)
Directly on target. Since the left square's green value is 128, its maximum green value ingame is also 128.
Reticle Mechanics - Color Combinations
TBC
Original site for guide: https://sites.google.com/site/allegzerofalcon/

